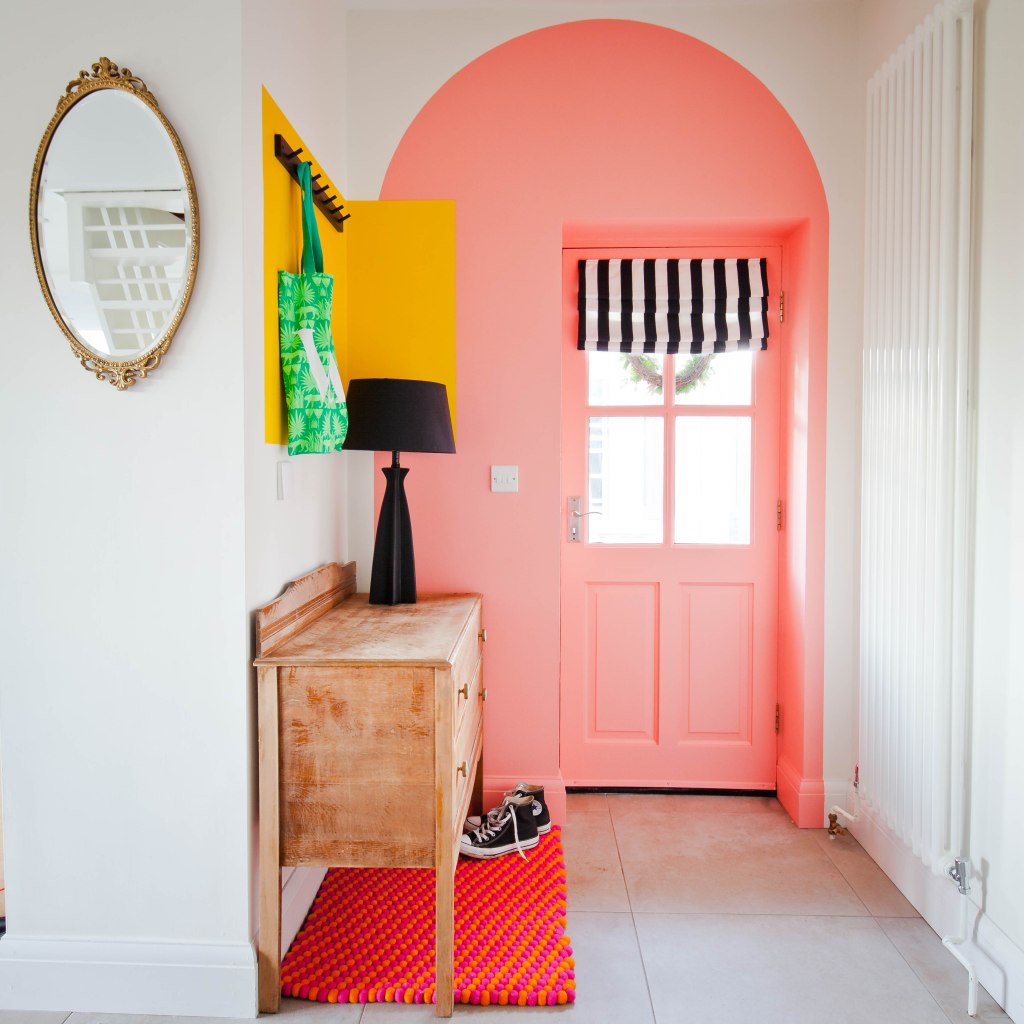
Arches had a big moment in 2019 and don’t seem to be going anywhere in 2020. Having been inspired by the masterful painting skills of @banyanbridges and @thistimeincolour I decided to paint my own mini mural when we redecorated the kitchen towards the end of last year and add an arch around my front door just recently.

Racheal @banyanbridges my mural muse 
Ola @thistimeincolour aspirational arches!
The kitchen cabinets were neutral, the worktops were being replaced with a marble effect quartz and so I had to get my signature colour fix in there somehow. Where we had previously inherited a hanging pan rack, I created a coral arch intersected with a minty green rectangle, genius or bonkers, either way I love it! On top of this I planned to mount some open shelving, mainly for aesthetics but practical enough to store the dishwasher tablets at least!

The mural above my kithen sink 
Before replacing the worktops and adding the mural
Getting started, you will need
- 2 pencils or a nail and one pencil
- Tape measure
- Long strip of card or piece of string
- Laser level
- Paint (I used a scrubabble paint for behind the sink so it can be easily wiped down)
- Frog tape
- A medium paint brush
- A roller and tray
Measuring the arch
The first thing you’ll need to do is decide how wide apart you want your vertical lines coming down from the arch, this will give you the diameter of your circle from which you can find the centre point half way across (the radius- GCSE maths coming back to you yet?!) Attach your pencils to either end of your string or poke holes in your strip of card (I prefer to use card as it stays rigid when you draw your arch) and double check your distance between them is the radius you just measured.
Drawing out the arch
Holding one pencil firmly on the centre line of your arch, reach the other pencil up to where you want the very top of your arch (you may need to drop your centre pencil down the mid line at this point if you are too close to the ceiling) Holding both pencils firmly to the wall (it’s a good idea to get someone to hold the centre one still for you while you draw the arch, alternatively, you could tack a nail in and fill the hole in later) using the top pencil, press lightly to draw a semi-circle.
Using a laser level and frog tape (Always the green frog tape) find the widest points of the arch and use tape to create the vertical lines down to the ground pressing the edges down firmly.
Adding to your design
If you plan to add other shapes to your design, now is the time to do it, I used the laser level and frog tape to form my rectangles judging the height and width by eye (although I had done a mock up on my laptop to play with the positioning and size of the rectangle).
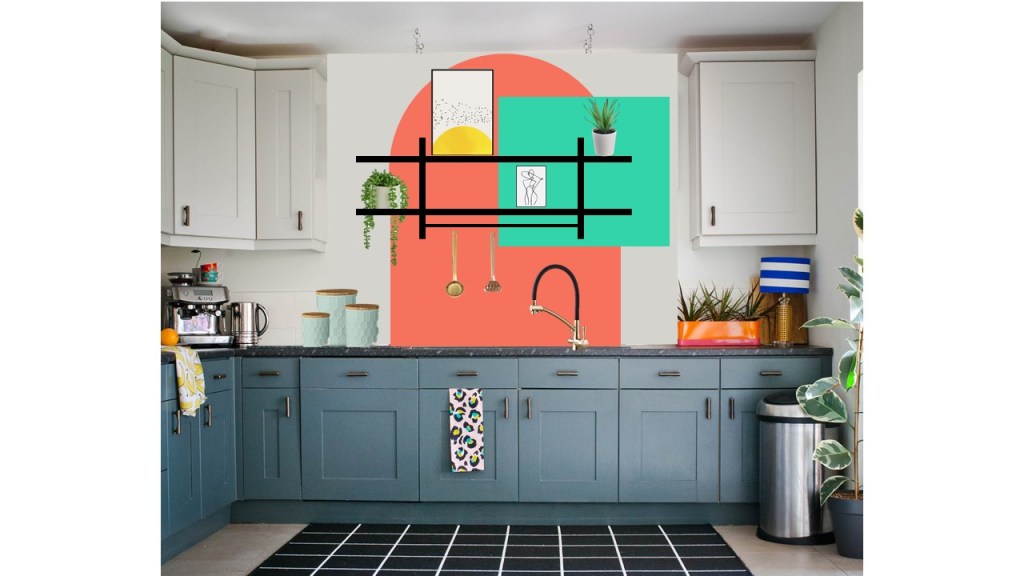
The mock up I made before getting the painbrushes out 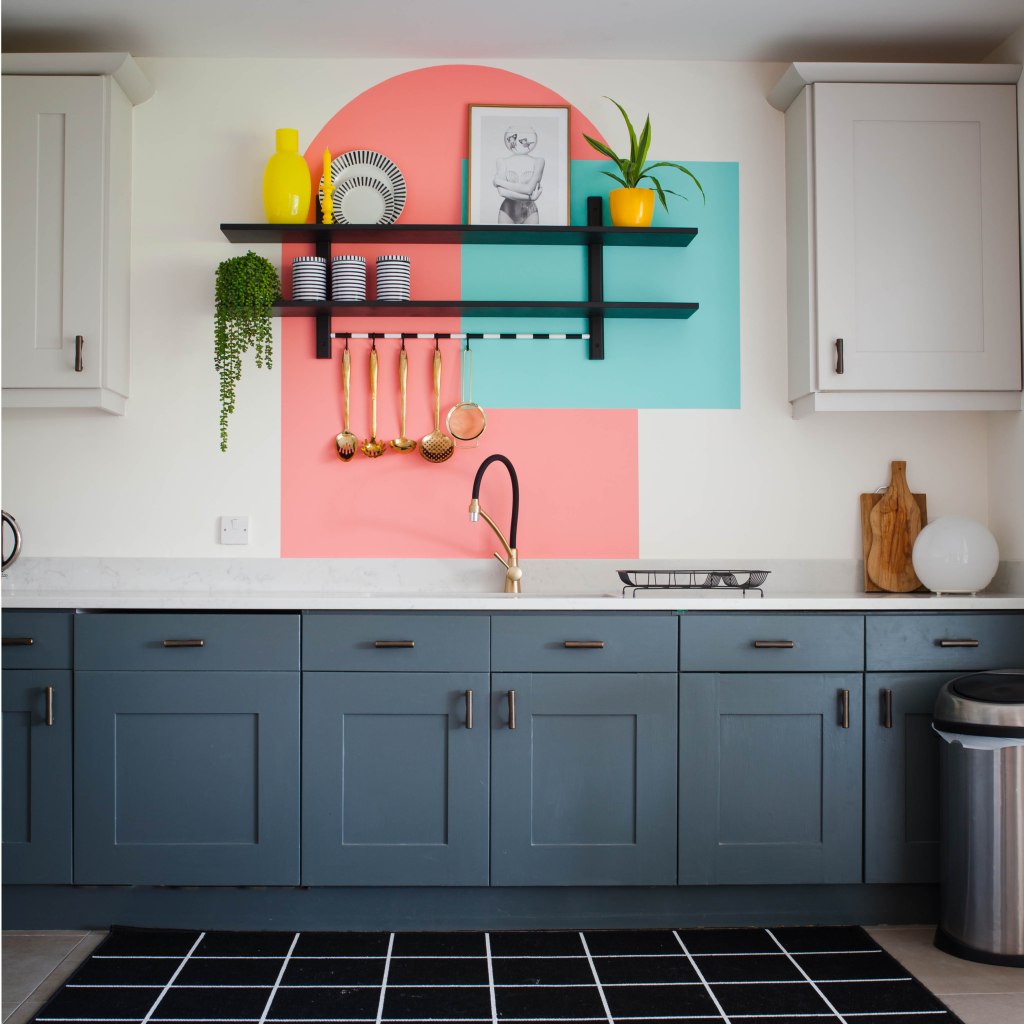
The finished result
Painting your mural
Using a medium brush and a steady hand, follow the curved line of your arch with your chosen paint, loading up the brush and spreading it out as you go. Fill the rest of the arch using a roller and to avoid bleeding under the tape of your vertical lines, use a roller here too. You can peel the tape off before it is totally dry at a 90˚ angle to the wall.
Stand back and admire your work, if anything doesn’t look quite right, now is the time to touch up. The best thing about this kind of DIY is that it can be done on any scale, using up left over paint and creates a huge impact! I’d love to see your arches if you give them a go, tag me!

Leave a comment